WOI Guides
Gaps Explained — Imbalance, Reaction and Context
How traders interpret gaps as price imbalances, why they often behave like zones, and how gap holds, fills and failures change the chart narrative.
In this guide
What a gap actually represents · Why gaps often behave like zones · Gap hold, gap fill and gap failure · Not all gaps mean the same thing · Bullish gaps vs bearish gaps · How gaps interact with support and resistance · Gap fills are not always bearish or bullish · How traders actually use gaps · How WOI Scanner uses gap logic · Checklist
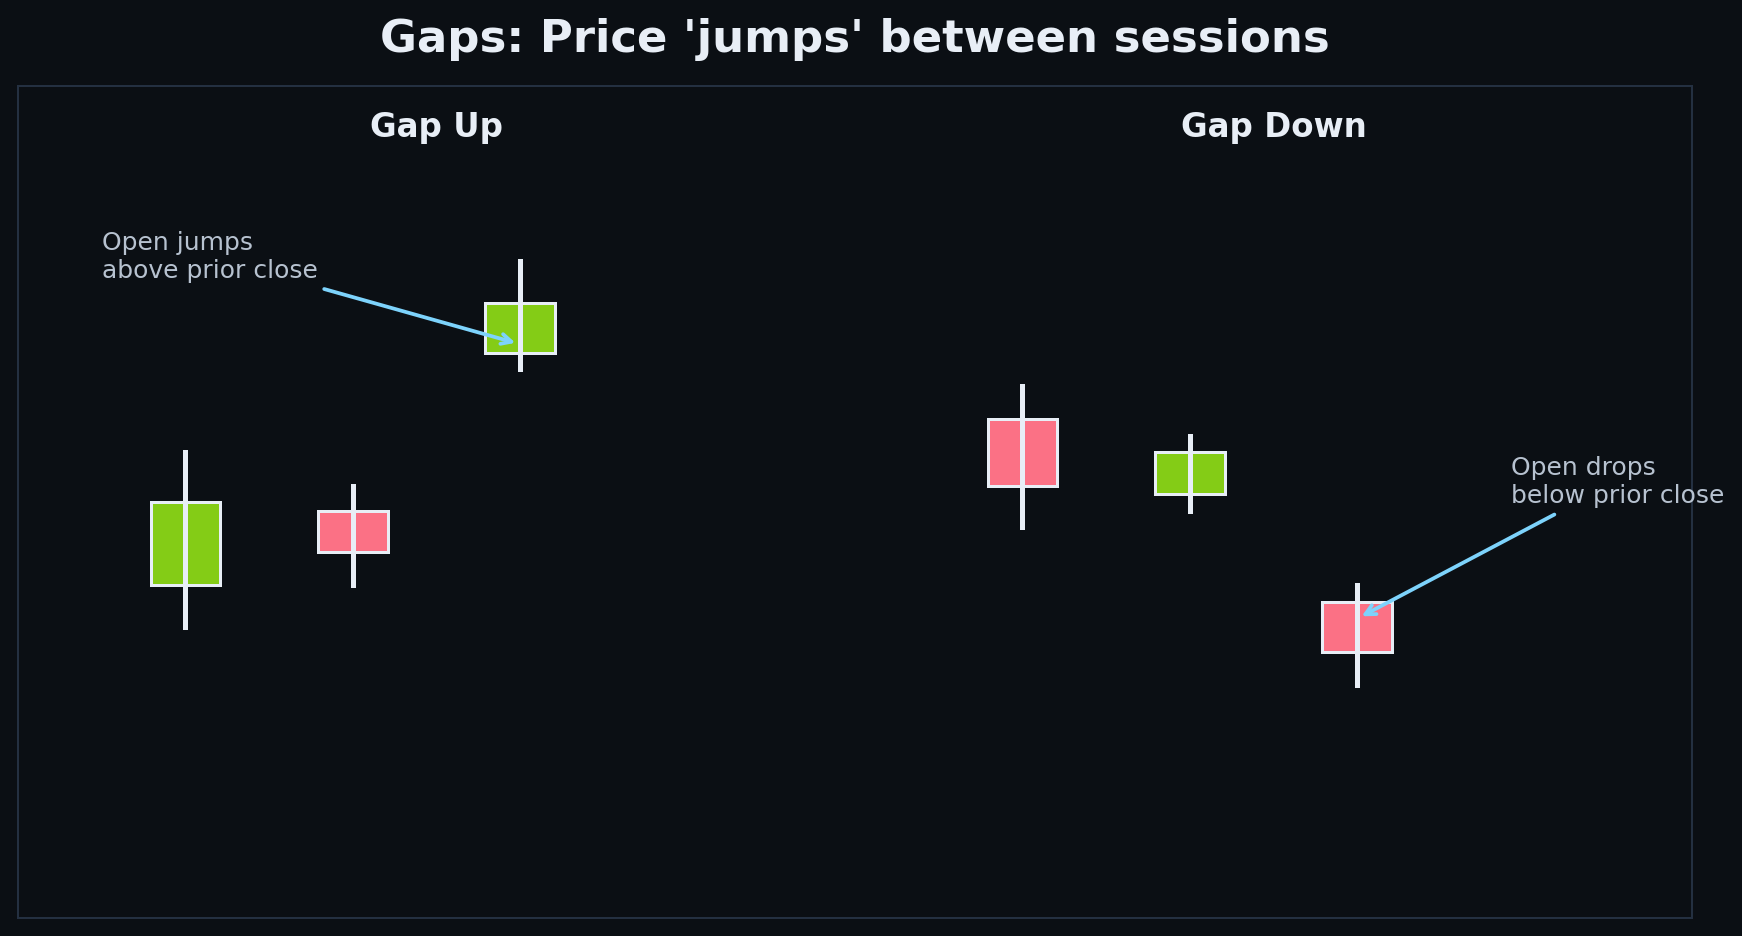
What a gap actually represents
A gap appears when price jumps from one area to another without trading through the prices in between. This usually means the market repriced quickly because new information, strong sentiment, or aggressive positioning changed where buyers and sellers were willing to transact. In practical terms, a gap often reflects imbalance. Price moved too fast for normal two-way trade to occur inside that range. That skipped area can remain important later because it marks a place where the market did not fully negotiate value in a normal way.
- A gap means price skipped a range instead of trading through it normally.
- Gaps often reflect rapid repricing and imbalance.
- They commonly appear after earnings, news or strong sentiment shifts.
- The skipped area can matter later because it was not fully traded.
- A gap is often more meaningful as a zone than as one exact price.
Why gaps often behave like zones
Many beginners look at a gap as a single event and then move on. More experienced traders often treat the gap as an area that can continue to influence price later. Because the market moved quickly through that zone, it may act like unfinished business. If price returns there, traders watch to see whether the area behaves as support, resistance, acceptance, or rejection. This is why gaps are often better treated as zones rather than precise lines. What matters is how price reacts when it revisits the imbalance.
- Gaps often matter after the initial move, not only during it.
- The gap area may act as support or resistance later.
- Reactions inside a gap can reveal acceptance or rejection.
- Zones are usually more realistic than exact lines.
- Gap behavior helps traders judge whether the repricing is holding or being challenged.
Gap hold, gap fill and gap failure
There are a few common ways a gap can behave. A gap hold happens when price stays above a bullish gap or below a bearish gap and continues in the same direction. A gap fill happens when price retraces back into the skipped area and trades through part or all of it, rebalancing the move. A failed gap happens when price quickly loses the gap zone and reverses hard, suggesting the original move did not have enough acceptance. These three outcomes often define the entire trade narrative around a gap.
- A gap hold suggests the repricing is being accepted.
- A gap fill suggests the move is being partially or fully rebalanced.
- A failed gap suggests weak acceptance and possible reversal.
- The reaction after the gap often matters more than the gap itself.
- Gap behavior can shift the whole chart narrative quickly.
Not all gaps mean the same thing
A gap caused by earnings is not the same as a small routine opening imbalance. Some gaps carry major informational value because the company or market received something new and important. Other gaps are more mechanical and can fade quickly. The source of the gap matters because it affects how seriously traders treat the move. A high-conviction earnings gap aligned with strong trend structure may deserve more respect than a random open that occurs inside a messy range.
- Earnings gaps usually carry different weight than routine opens.
- News-driven gaps often matter more than random low-conviction gaps.
- The source of the gap helps determine its significance.
- A strong gap inside good structure is usually more important.
- A weak gap inside messy price action may fail quickly.
Bullish gaps vs bearish gaps
Bullish gaps often act like support zones if price can hold above them. If price revisits the upper part of the gap and buyers respond, the market may be showing that the repricing is being accepted. Bearish gaps often behave like resistance zones if price rallies back into them and sellers take control again. In both cases, traders are not just asking whether the gap exists. They are asking which side is defending it and whether the market is accepting the move or undoing it.
- Bullish gaps can behave like support if buyers defend them.
- Bearish gaps can behave like resistance if sellers defend them.
- Revisits into the gap often reveal who is in control.
- Acceptance and rejection matter more than the label alone.
- Gap direction should be read together with overall chart structure.
How gaps interact with support and resistance
A gap does not replace normal technical structure. Support and resistance still matter. In many cases, a gap becomes more meaningful when it overlaps with a prior breakout level, a major high or low, or another obvious area on the chart. This is often called confluence. If a bullish gap lines up with reclaimed resistance that is trying to become support, that area may become much more interesting. If a bearish gap forms right under a major resistance zone, rallies into the gap may struggle even more.
- Gaps become stronger when they align with existing levels.
- Confluence often improves the importance of a gap zone.
- Support and resistance still matter even when a gap is present.
- A gap near a major level can shape future reactions.
- Context usually determines whether the gap deserves extra attention.
Gap fills are not always bearish or bullish
One common mistake is assuming that every gap fill is automatically bad for a bullish chart or good for a bearish one. In reality, some gap fills are normal and healthy. Price may retrace into part of the gap, stabilize, and then continue in the original direction. In other cases, a full gap fill may signal deeper weakness or full rejection. What matters is the behavior inside and around the gap zone: does price absorb the retracement and reclaim strength, or does the fill turn into a broader reversal?
- A gap fill is not automatically bearish or bullish by itself.
- Partial fills can be normal inside healthy trends.
- Some full fills are harmless, while others signal failure.
- Reclaim behavior after a fill often matters a lot.
- The reaction inside the gap is more important than the word fill alone.
How traders actually use gaps
Traders use gaps in several practical ways. Some use them as support and resistance zones. Others use them as reference points for continuation, failure, or reclaim setups. A bullish gap that holds may support trend continuation. A bearish gap that rejects price may support short setups. A filled gap that quickly reclaims can create a different opportunity entirely. The key idea is that gaps are not just visual curiosities. They are decision areas where sentiment, positioning and structure often interact in a visible way.
- Traders often use gaps as support and resistance zones.
- Gaps can frame continuation, reclaim and failure setups.
- Holding a bullish gap can support long ideas.
- Rejecting inside a bearish gap can support short ideas.
- A reclaimed gap can change the whole setup quality.
How WOI Scanner uses gap logic
The WOI Scanner treats gaps as technically meaningful imbalances rather than random visual events. Gap zones can be used as reference areas for support, resistance, narrative context and post-move reactions. The point is not to assume that every gap must fill or that every gap must hold. The point is to identify where price skipped value, then track how the market behaves when it revisits or defends that area.
- The scanner treats gaps as imbalance zones.
- Gap areas can enrich support and resistance analysis.
- The focus is on reaction quality rather than gap myths.
- Revisits, holds and failures all matter.
- Gap logic helps make the narrative more grounded.
Checklist
Before trading around a gap, it helps to define exactly what type of behavior the chart is showing and what would invalidate the idea. This prevents traders from reacting emotionally to the visual size of the gap and keeps the focus on structure, acceptance and risk.
- Was the gap driven by earnings, news or a routine open?
- Is price holding the gap, filling it, or failing it?
- Is the gap aligned with support, resistance or another major level?
- How is price behaving when it revisits the gap zone?
- What level invalidates the gap thesis?
- Does the setup still offer acceptable risk-to-reward?
Apply this in WOI
Open the scanner, pick one symbol, and practice:
mark zones, decide trend regime, and write one invalidation level.
The goal is a repeatable process, not perfect predictions.
Disclaimer: Educational content only. Not financial advice.