WOI Guides
Support and Resistance — Zones, Not Lines
Understanding how price reacts around important levels and why zones are more useful than exact prices.

In this guide
Why levels matter
Support and resistance matter because markets tend to remember important decision areas. When price turns sharply from a level, stalls there repeatedly, or accelerates after breaking it, that area becomes meaningful for future trade decisions. These zones are not magical barriers, but they often reflect where buyers and sellers previously changed behavior.
- Support and resistance mark areas where supply and demand previously shifted.
- These areas often become decision points where traders watch for reactions.
- When price revisits such zones, similar behavior may occur again.
- Important levels help traders plan entries, stops and targets more logically.
- Price location often matters as much as the setup itself.
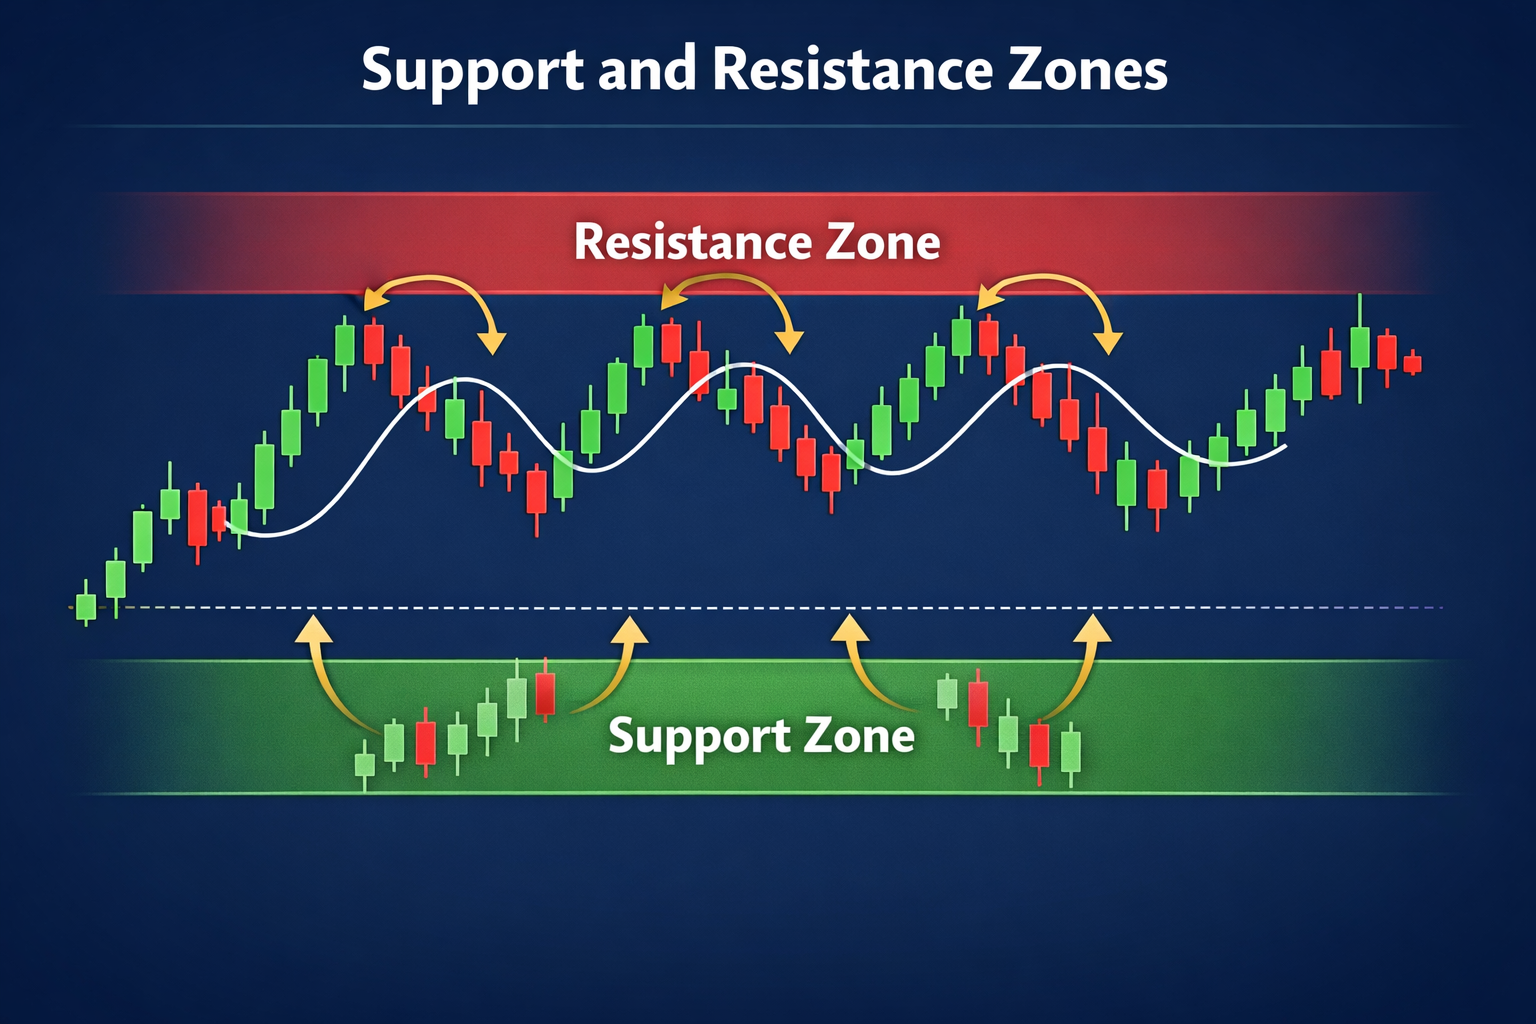
Zones instead of precise prices
A common beginner mistake is drawing support and resistance as thin exact lines. Real markets rarely reverse at one perfect number. Orders are clustered across small price areas, not single ticks. That is why zones are usually more realistic than exact levels. A zone also helps traders avoid the illusion that every tiny break is meaningful.
- Markets rarely reverse at a single price point.
- Reactions usually occur within a price area where orders cluster.
- Drawing zones rather than precise lines better reflects real market behavior.
- Zones are especially useful on volatile stocks where exact prices are less reliable.
- Thinking in zones reduces overtrading and false precision.
What makes a level strong
Not every level is equally important. Strong levels usually stand out because price reacted there more than once, left the area with force, or aligned with other chart structures. The more market participants notice a level, the more relevant it becomes. Traders should always prefer clean, obvious zones over minor noisy pivots.
- Multiple reactions at the same area increase significance.
- Strong moves away from the level suggest real imbalance.
- Confluence with other signals such as moving averages or trendlines adds weight.
- Higher timeframe levels are usually more important than minor intraday reactions.
- The cleanest and most obvious levels are often the most useful.
Breakouts and failures
A breakout is not important just because price traded beyond a level for a moment. What matters is acceptance. If price breaks a resistance zone and then holds above it, the breakout has more credibility. If price immediately falls back into the prior range, the move may be a fakeout. Many poor trades come from reacting to the first break instead of waiting for evidence.
- Breakouts become more meaningful when price holds above the level after breaking it.
- If price quickly returns inside the range, the breakout may have failed.
- Acceptance above the level is often more important than the initial break.
- Retests can provide better entries than chasing the first breakout candle.
- Failed breakouts are common near obvious crowded levels.
Support becomes resistance (role reversal)
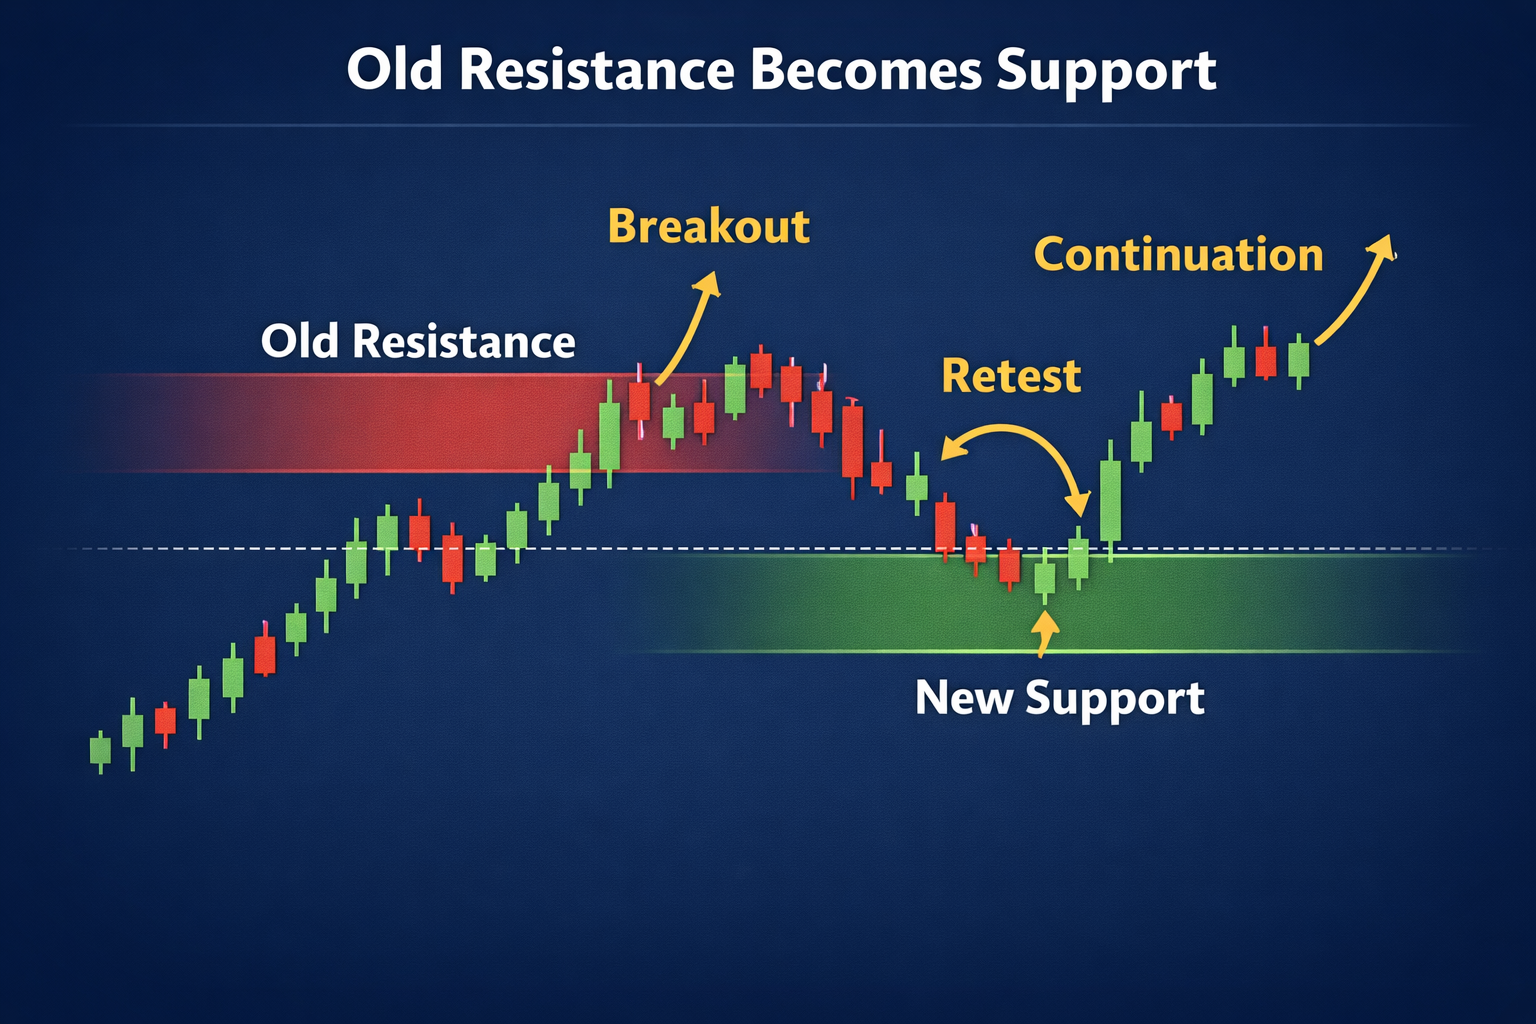
One of the most useful ideas in technical analysis is role reversal. After a breakout, old resistance can become new support. After a breakdown, old support can become new resistance. This happens because traders who missed the move wait for a retest, while trapped traders may be forced to exit at the same area. Many clean continuation trades are built on this behavior.
- When price breaks above resistance and later returns, the old resistance often acts as support.
- When price breaks below support and later retests, the old support can act as resistance.
- Role reversal often appears in breakout → retest → continuation structures.
- This behavior is useful for both entries and invalidation planning.
- The best retests usually happen with controlled pullbacks rather than chaotic reversals.
Trading ranges and range boundaries
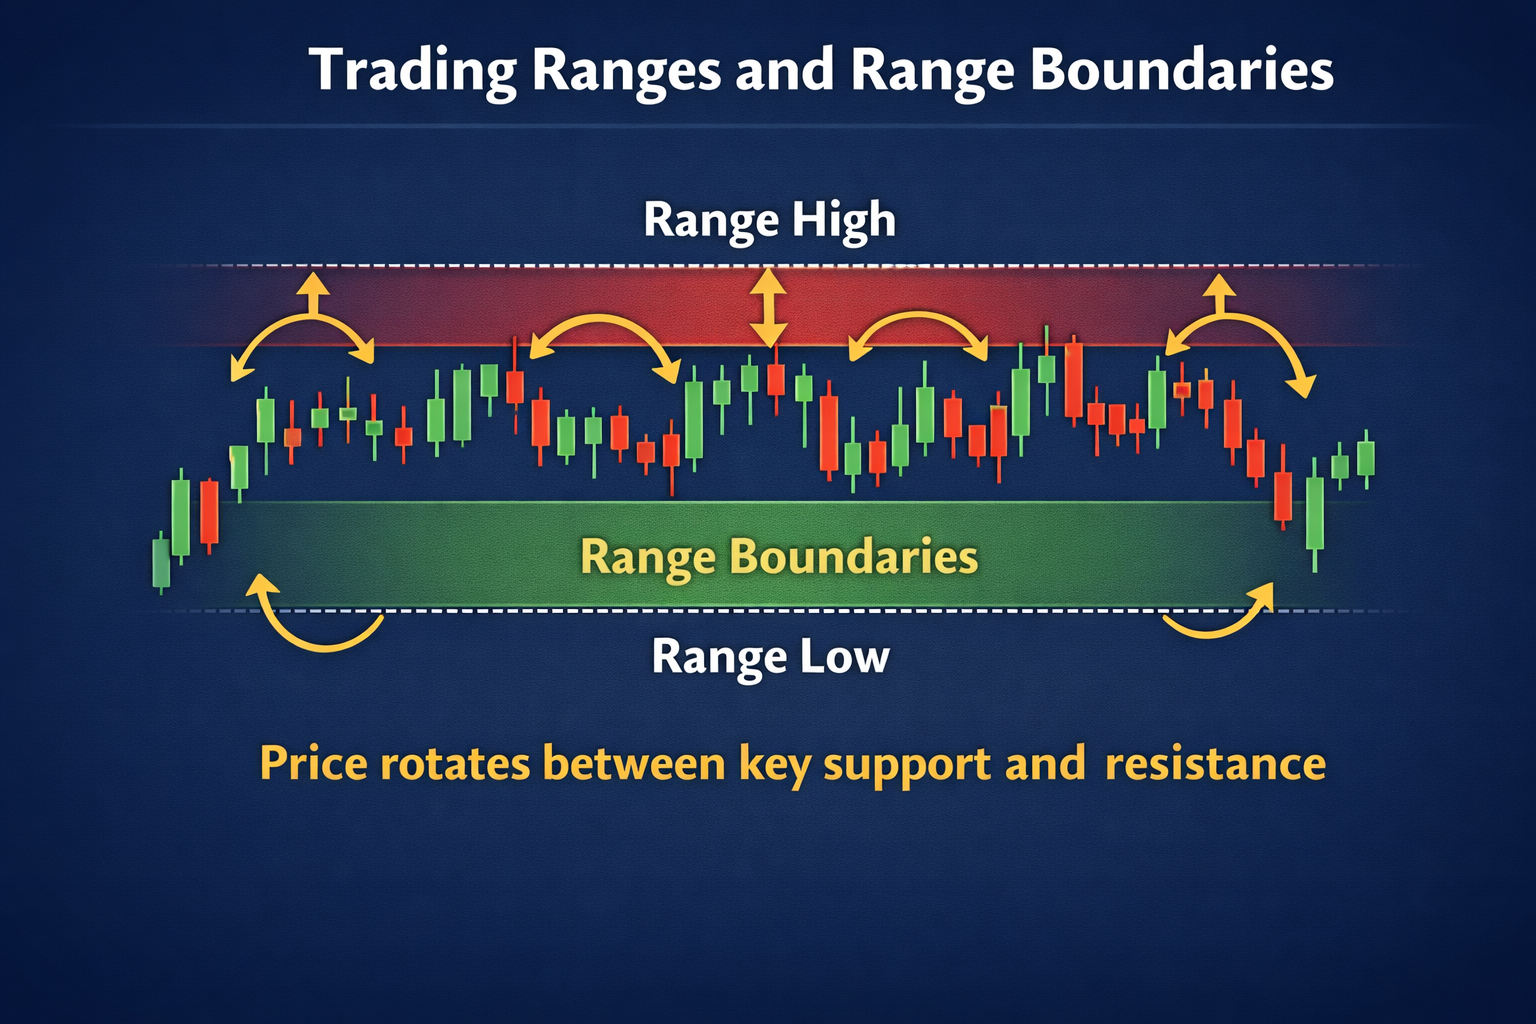
Support and resistance become especially important in range-bound markets. In a range, traders are often dealing with two boundaries rather than a trending structure. Support is the area where buyers keep responding, and resistance is where sellers repeatedly appear. The center of the range is usually the weakest place to take a trade because the reward-to-risk profile is poor.
- In range markets, support is where buyers usually step in and resistance is where sellers usually appear.
- Traders often buy near support and sell near resistance while the range remains intact.
- The middle of the range is usually a low-quality area because risk-to-reward is poor.
- A breakout from a range can start a new trend if price holds outside the boundary.
- Knowing whether the market is trending or ranging changes how levels should be used.
How traders actually use levels in trade planning
Professional traders do not draw levels just to make charts look sophisticated. They use levels to structure trades. A level helps answer practical questions: where might I enter, where does the idea fail, and where is the next target? This is why support and resistance are directly tied to risk management, position sizing and trade timing.
- A trader may enter near support, place a stop below the zone and target the next resistance area.
- The distance between entry and stop defines the risk.
- The distance to the next major level helps estimate potential reward.
- Good trade location often matters more than indicator signals.
- Levels help traders avoid random entries in the middle of the chart.
Common mistakes when drawing levels
Support and resistance are simple in theory but often misused in practice. The biggest mistakes come from overcomplicating charts or treating every touch as a trading signal. Levels should improve decision quality, not create visual noise. Fewer, clearer zones are usually better than dozens of minor lines.
- Drawing too many levels until the chart becomes unreadable.
- Using exact price lines instead of zones.
- Ignoring higher timeframe levels and focusing only on small moves.
- Treating every touch as a trade signal without confirmation.
- Trading in the middle of a range instead of near the boundaries.
Checklist
Before using a support or resistance level in a trade, it helps to ask a few simple questions. This keeps the focus on context and risk rather than on drawing alone.
- Did the level produce multiple reactions historically?
- Did price close clearly beyond the zone or just poke through it?
- Is there nearby overhead resistance or nearby support underneath?
- Would the trade idea still make sense if price retests the level?
- Where would the idea be invalidated if the reaction fails?
Apply this in WOI
Open the scanner, pick one symbol, and practice:
mark zones, decide trend regime, and write one invalidation level.
The goal is a repeatable process, not perfect predictions.
Disclaimer: Educational content only. Not financial advice.